
Summary
A project is the job you are going to do for one specific client: for example, the master bedroom closet. Each client can have several projects open at the same time, and inside a project you group all the units of the piece.
Steps
-
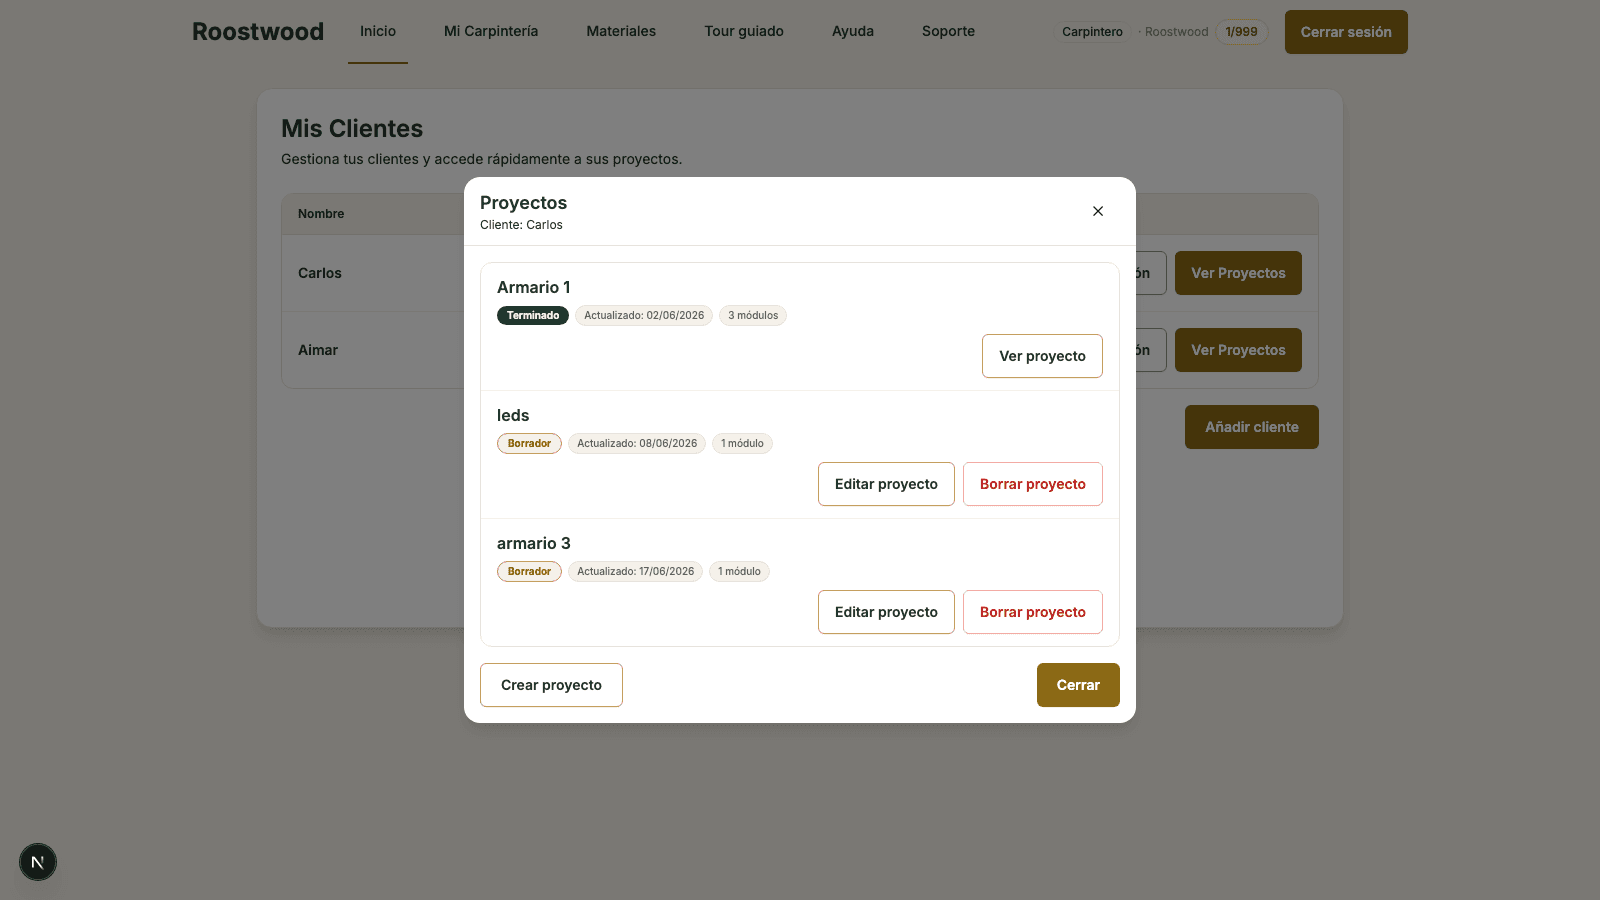
Open the client's projects. On the My Clients screen, press View Projects on the client's row. A modal titled Projects opens with the list of existing projects (sorted by last edit). Each one shows its status (Draft or Finished), the number of sections and the date of the last change.
-
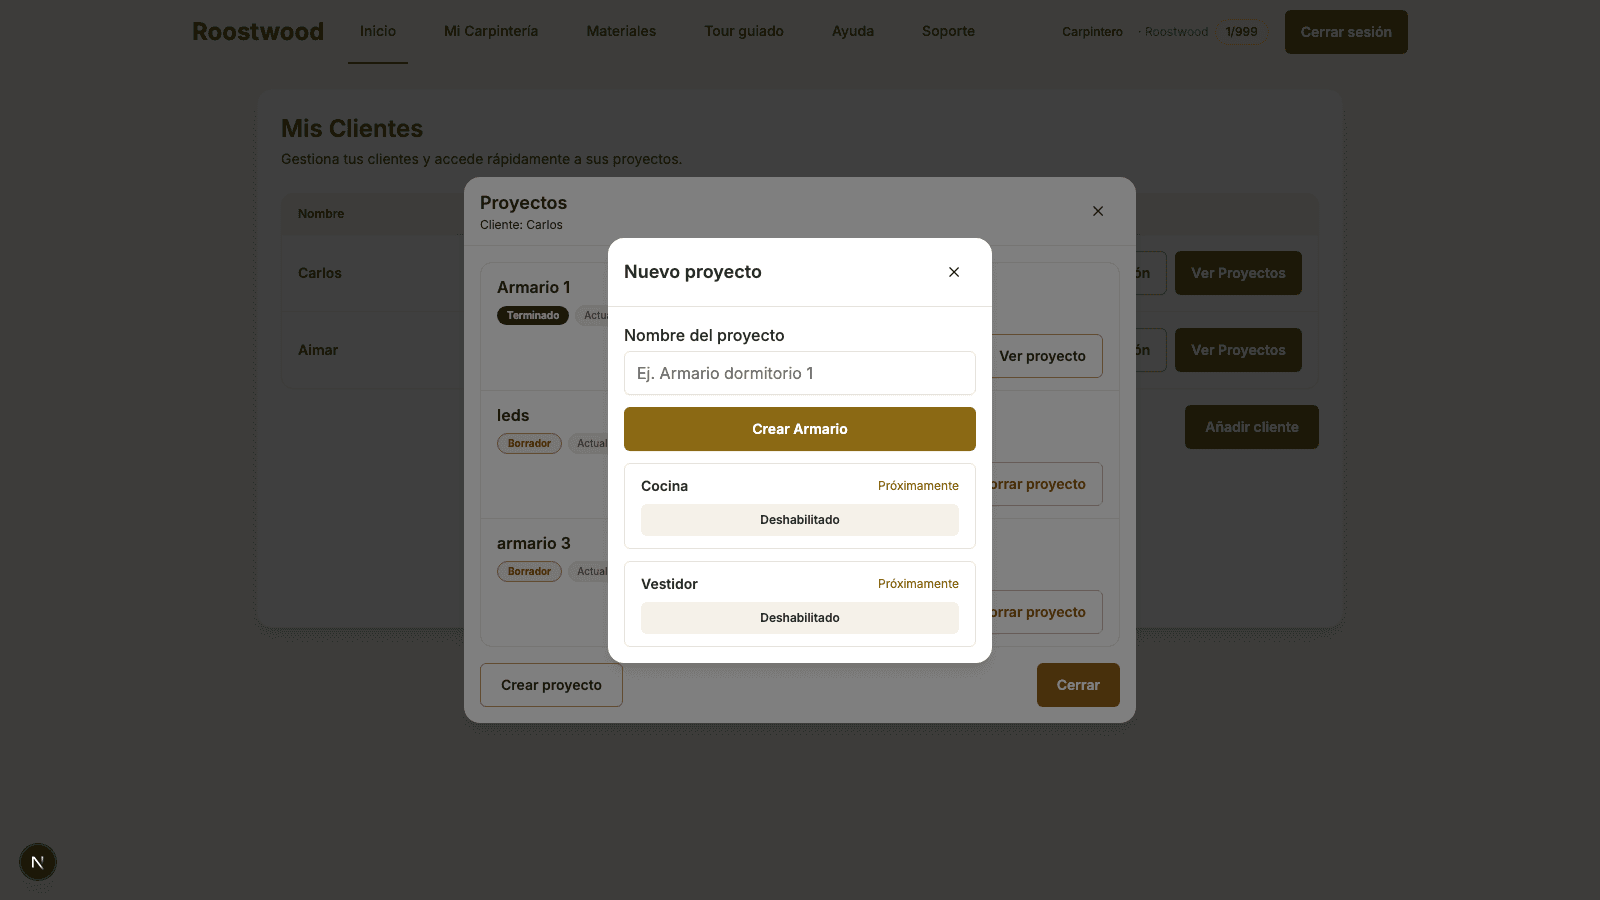
Press "Create project" and choose the type. The button lives at the bottom left of the modal. It opens a second modal called New project with a name field and three project types. For now only Create Closet is enabled; Kitchen and Walk-in closet will arrive in future versions (you will see the Coming soon tag).
-
Type the name and create the closet. The name is what you will use to recognize the project later (e.g. Master bedroom or Hallway). Press Create Closet and you will land directly in the designer at the first step (setting up the measurements).
Tips
- The Draft status is editable; Finished is frozen — you cannot change sections. To edit a finished project again, contact support.
- Finishing a closet consumes one closet from your balance; deleting a draft does not consume anything.
- The name can be changed later by editing the project.