
Summary
When you finish a project, the system generates the cut list: the complete list of pieces to cut with their measurements, material, edge banding and miters. You can review it piece by piece, edit notes and manual adjustments, and download it in formats your saw or the workshop's ERP understands.
Steps
-
Open the finished project. From the client's Projects modal, press View project on one marked Finished. You enter the designer in read-only mode: you see the completed sections, the closet in 3D and, at the bottom, a bar with the export buttons (Cut list, Infographic, SketchUp, DXF, Quote, Send to provider).
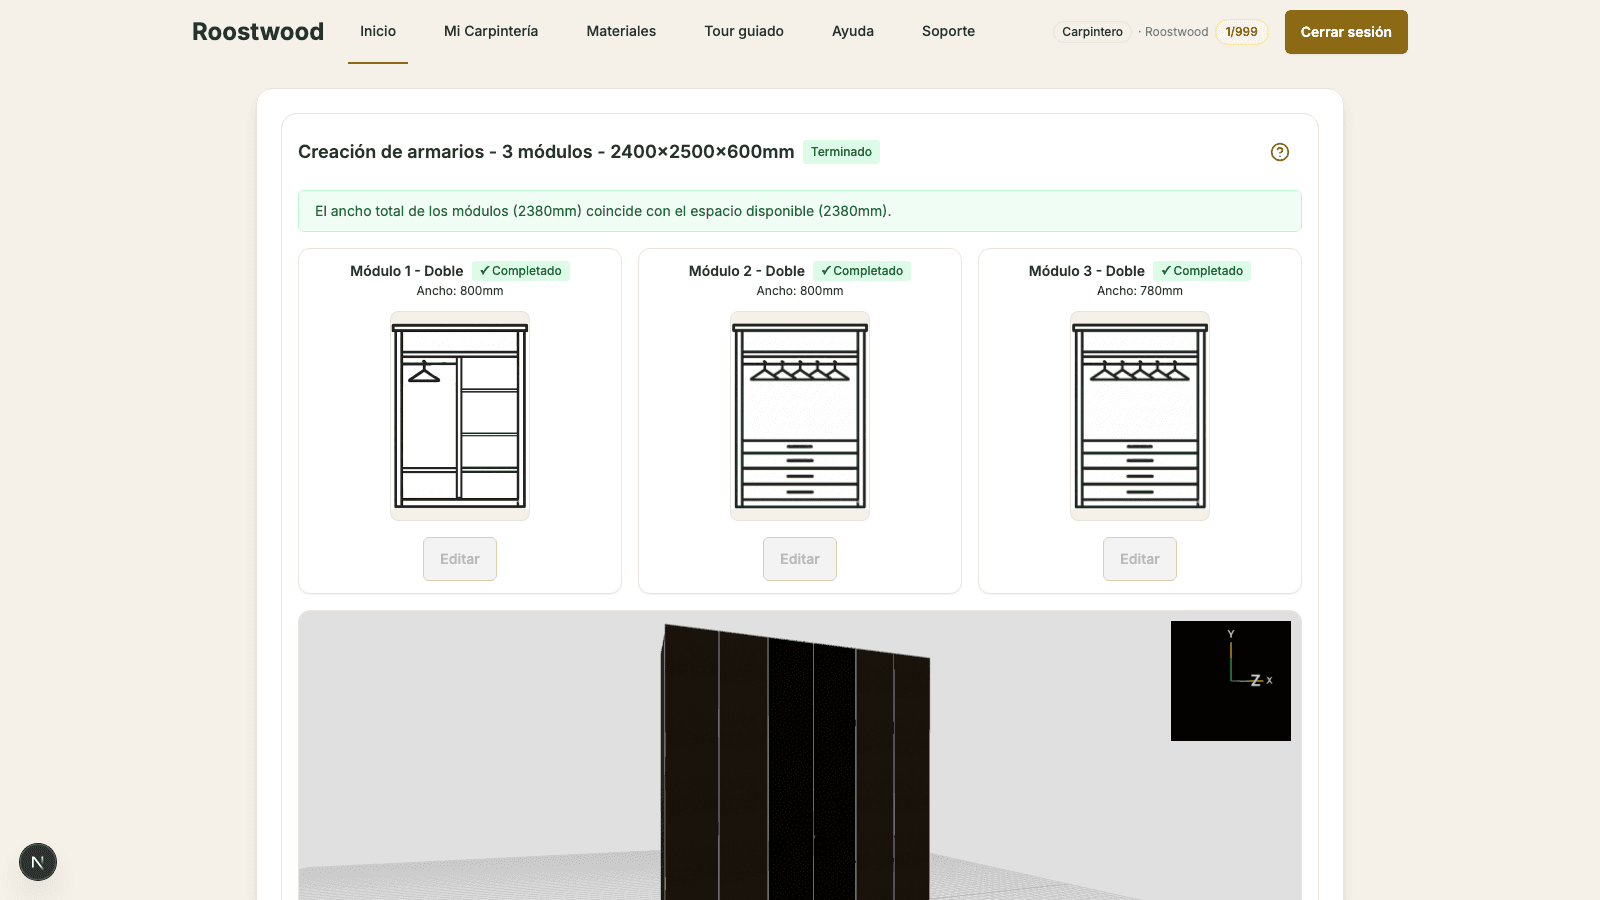
-
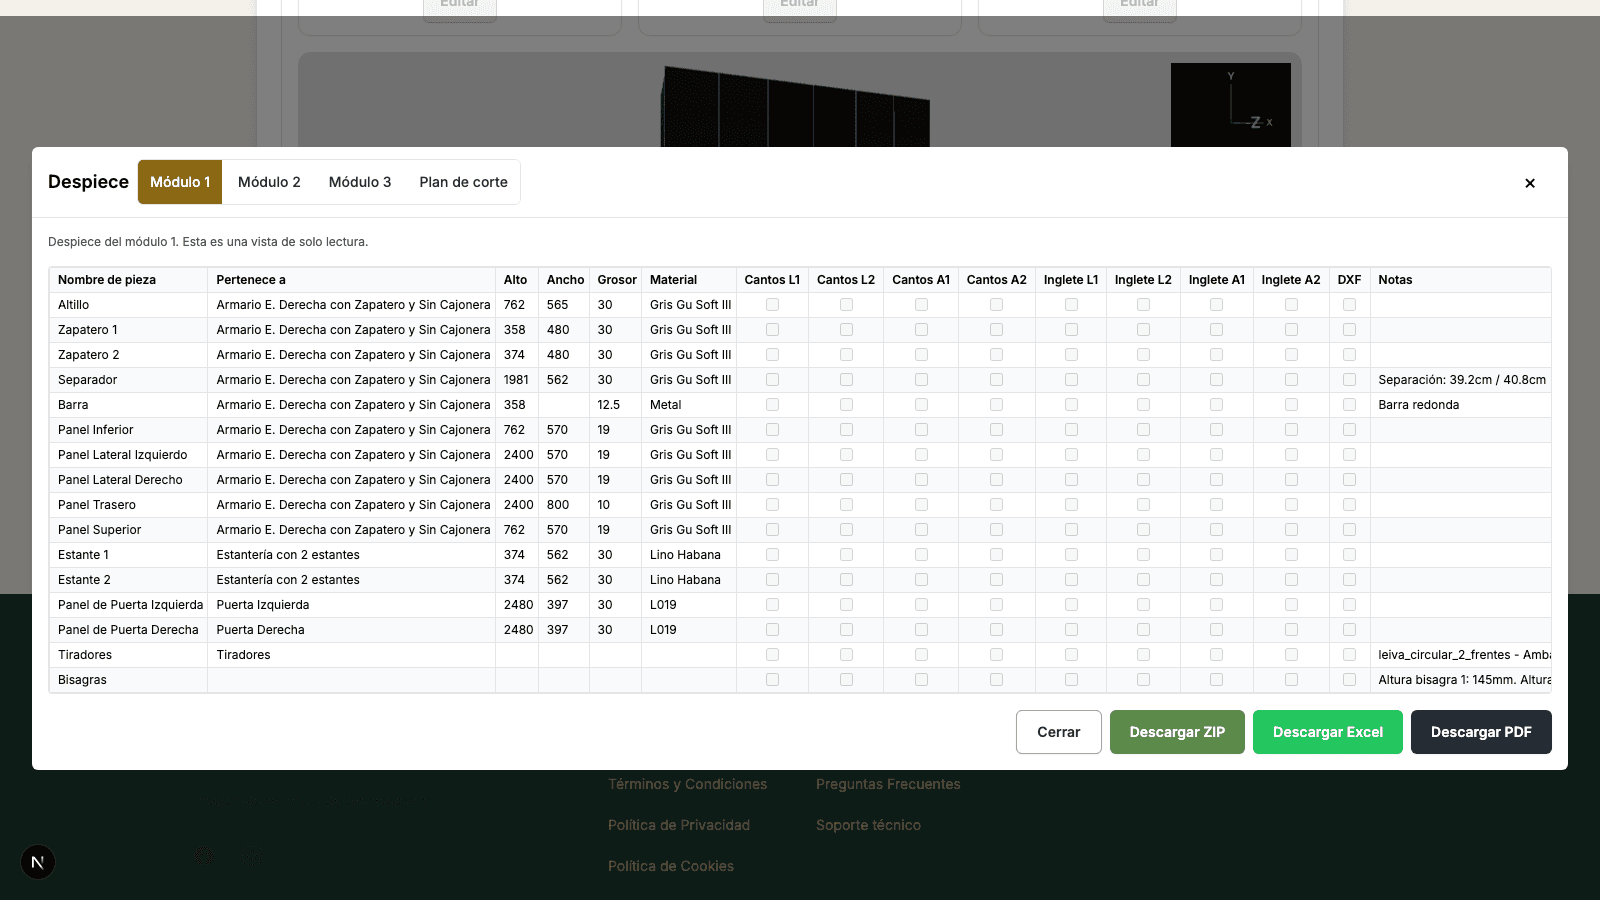
Press "Cut list". The Cut list modal opens with a long table: each row is a piece with its material, thickness, width, height, edge banding (L1/L2/W1/W2), miters and notes. The edge banding and miter columns are editable with a check; Notes is free text. Names and dimensions are protected to avoid accidental mistakes.
-
Edit what you need and download. Check edge banding and adjust miters as needed: the measurements recalculate automatically when there is a mitered joint. When it is ready, use the download buttons at the bottom of the modal:
- Download ZIP — the DXF drawings packaged for CNC / cutting software.
- Download Excel — the tabulated cut list to review in Excel or LibreOffice.
- Download PDF — a printable version for the workshop.
Tips
- If you enable a miter on an edge, the system reduces the piece's width or height automatically so the joint fits. You don't have to adjust the measurements by hand.
- The Notes column is exported to the CSV/PDF: use it for things like "Take two to the workshop" or "Use offcut material".
- The Fillers rows (the profiles that add thickness on the fronts) and Visible parts only appear if you enabled them in the Extras step.